
What Is the #1 Mistake Made When Making Banana Bread? How to Fix
What Is the Number One Mistake Made When Making Banana Bread?
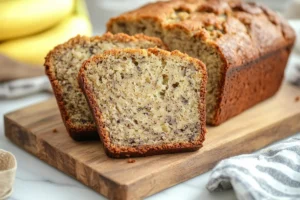
If you’ve ever wondered, “What is the number one mistake made when making banana bread?”—you’re not alone. Many home bakers face this question after pulling a loaf out of the oven only to find it dense, dry, or oddly textured. The answer might surprise you: overmixing the batter. It’s a simple yet common error that can turn your dreamy, moist banana bread into something far less appetizing. But why does this happen? And how can you avoid it?
Overmixing often stems from a few misunderstandings and habits. First, some bakers believe that mixing the batter longer ensures all the ingredients are perfectly combined. While it’s true that thorough mixing is important, going overboard can cause problems. Others may rush through the process, especially if they’re short on time or multitasking in the kitchen. Using the wrong tools, like a stand mixer instead of a spatula or wooden spoon, can also lead to overmixing because these tools are too aggressive for delicate batters.
This mistake directly connects to the frustration many people feel when their banana bread turns out heavy or uneven. If you’ve ever sliced into a loaf only to find a gummy center or an oddly cracked top, overmixing could be the culprit. Understanding this issue can save you from countless baking disappointments and help you create a light, fluffy, and delicious treat every time.
Now that we’ve teased the problem, let’s dive deeper into why overmixing ruins your banana bread and how you can spot the signs before it’s too late.
Why Overmixing Ruins Your Banana Bread
Overmixing isn’t just a minor slip-up—it’s a recipe killer. To understand why this happens, we need to look at what’s going on inside your batter when you mix it too much. Spoiler alert: gluten is the main villain here. Knowing how to manage it will transform your banana bread game.
The Science Behind Overmixing
When you mix flour with liquid ingredients, gluten—a protein found in wheat—starts to develop. Gluten gives structure to baked goods like bread and pizza dough, but banana bread doesn’t need much of it. In fact, too much gluten makes your loaf tough and chewy rather than soft and tender. Every extra stir activates more gluten strands, creating a dense network that traps air bubbles unevenly. This results in a heavier texture and prevents your banana bread from rising properly.
Another factor is the distribution of wet and dry ingredients. Overmixing forces these components to become overly homogenized, which sounds good in theory but actually disrupts the balance needed for a moist crumb. Instead of blending gently, excessive mixing causes the starches in the flour to absorb too much moisture, leaving your bread dry and unappealing.
Signs Your Batter Is Overmixed
How do you know if you’ve crossed the line? There are clear warning signs that your batter has been overmixed. One telltale sign is a gummy crumb once the bread cools. This sticky texture occurs because the excess gluten traps steam during baking, preventing proper evaporation. Another red flag is a cracked or domed top, which indicates uneven rising caused by tight gluten networks. Finally, if your loaf feels heavier than expected or sinks slightly in the middle, overmixing is likely to blame.
How to Test Batter Consistency
To avoid these pitfalls, pay attention to your batter’s consistency as you mix. Ideally, your banana bread batter should look lumpy and slightly uneven—not smooth like pancake batter. Here’s how to check:
- Visual Cues: Look for streaks of flour or small lumps. These aren’t flaws; they’ll disappear as the batter bakes.
- Texture Cues: The batter should feel thick but still pourable. If it’s stiff or elastic, stop mixing immediately.
- Tool Check: Use a spatula or wooden spoon instead of electric mixers. These tools give you better control and reduce the risk of overmixing.
By mastering these techniques, you’ll ensure your banana bread stays light, fluffy, and packed with flavor. Next, we’ll explore how to fix and prevent overmixing so you can bake with confidence.
Step-by-Step Fixes for the #1 Banana Bread Mistake
Now that we’ve identified overmixing as the number one mistake made when making banana bread, let’s dive into how you can fix it—or better yet, prevent it altogether. Whether you’re a seasoned baker or just starting out, these step-by-step solutions will help you achieve the perfect loaf every time. From simple rules to follow while mixing to quick fixes for overmixed batter, this section has everything you need to turn your banana bread dreams into reality.
4 Rules to Avoid Overmixing
Preventing overmixing starts with adopting the right techniques. Here are four golden rules to keep in mind:
- Fold Gently: When combining wet and dry ingredients, resist the urge to stir vigorously. Instead, use a folding motion—gently scooping the batter from the bottom of the bowl and turning it over. This minimizes gluten development and keeps the texture light.
- Use a Spatula or Wooden Spoon: Electric mixers are great for cakes and cookies, but they’re too powerful for banana bread batter. Stick to a spatula or wooden spoon, which allows you to mix more gently and maintain control over the consistency.
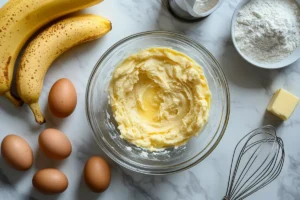
- Mix Wet and Dry Ingredients Separately: Combine all your wet ingredients (like mashed bananas, eggs, and oil) in one bowl and all your dry ingredients (flour, baking soda, salt) in another. Then, pour the wet mixture into the dry ingredients. This ensures even distribution without overworking the batter.
- Stop Mixing When Streaks Remain: Your batter doesn’t need to be perfectly smooth. In fact, stopping when you still see small streaks of flour is ideal. The residual heat from baking will finish blending everything together without risking overmixing.
By following these rules, you’ll set yourself up for success and avoid the frustration of dense or gummy banana bread.
How to Salvage Overmixed Batter
Oops—you’ve already overmixed your batter. Don’t panic! There are ways to salvage it before it hits the oven. While overmixing can’t be completely undone, these quick fixes can help improve the final result:
- Add a Splash of Milk or Yogurt: Overmixed batter often becomes too thick and stiff. Adding a small amount of liquid, like milk, buttermilk, or yogurt, can loosen it up and reintroduce some moisture. Start with a tablespoon at a time until the batter regains a pourable consistency.
- Incorporate Extra Leavening Agents: If your batter feels heavy, adding a pinch of baking powder or baking soda can give it an extra lift. Be cautious not to overdo it, though, as too much leavening can cause the bread to collapse.
- Let It Rest Before Baking: Allowing the batter to sit for 10–15 minutes before pouring it into the pan gives the gluten strands time to relax. This won’t eliminate the effects of overmixing entirely, but it can soften the texture slightly.
- Adjust Expectations: If none of the above works, prepare yourself for a denser loaf. Serve it warm with butter or honey to enhance its flavor and make it more enjoyable.
While prevention is always better than cure, knowing how to handle mistakes makes you a more confident baker.
Tool Swaps for Better Mixing
Sometimes, the tools you use play a big role in whether your banana bread turns out perfectly or falls flat. Here’s how swapping your tools can make a difference:
- Wooden Spoon vs. Electric Mixer: A wooden spoon is gentler on the batter and helps you avoid overmixing. Unlike electric mixers, which can whip air into the batter too aggressively, a wooden spoon lets you blend ingredients slowly and intentionally.
- Silicone Spatula for Folding: Silicone spatulas are flexible and excellent for scraping bowls clean while minimizing wasted batter. They’re also perfect for folding in delicate ingredients like mashed bananas or chocolate chips without overworking the mixture.
- Whisk for Dry Ingredients Only: Whisks are great for aerating dry ingredients like flour and sugar, but they’re not ideal for combining wet and dry components. Switch to a spatula once you start incorporating liquids.
- Hand Mixer on Low Speed (If Necessary): If you must use an electric mixer, keep it on the lowest speed setting and mix for no more than 10–15 seconds after adding the dry ingredients. Any longer, and you risk activating too much gluten.
Choosing the right tools—and using them correctly—can save you from many common baking mishaps. With these tips in mind, you’re well-equipped to tackle the #1 banana bread mistake head-on.
With these strategies under your belt, you’re ready to bake banana bread that’s light, moist, and utterly delicious. Next, we’ll explore how mastering this skill ties into creating a simple yet mouthwatering three-ingredient banana bread recipe. Stay tuned!
5 Pro Tips to Perfect Your Banana Bread Recipe
Even if you’ve mastered avoiding the number one mistake made when making banana bread—overmixing—there are still other tricks to elevate your recipe. These five pro tips will help you fine-tune your process and ensure every loaf is as delicious as possible. From choosing the right bananas to testing for doneness, these insights will take your banana bread game to the next level.
Use Ultra-Ripe Bananas (How to Spot the Perfect Ripeness)
The secret to amazing banana bread starts with the star ingredient: bananas. But not just any bananas—ultra-ripe ones. Ripe bananas are sweeter, softer, and packed with natural sugars that caramelize during baking, giving your bread its signature rich flavor. So how do you know when a banana is ripe enough? Look for these signs:
- Black Spots on the Peel: Small brown or black spots indicate peak ripeness. The peel might even be mostly brown, which is perfect for baking.
- Soft Texture: Gently squeeze the banana. If it feels mushy and gives easily, it’s ready to use.
- Strong Aroma: Ripe bananas have a sweet, fruity smell that signals their sugar content is at its highest.
If your bananas aren’t quite ripe yet, place them in a paper bag with an apple or tomato to speed up the process. You can also bake unpeeled bananas at 300°F for 15–20 minutes to soften them quickly.
Measure Flour Correctly (Avoid Compacting, Spoon-and-Level Method)
One of the most overlooked steps in baking is measuring flour accurately. Too much flour can make your banana bread dry and dense, so precision matters. Here’s how to measure it correctly using the spoon-and-level method:
- Fluff the Flour: Before scooping, stir the flour in its container to loosen it up.
- Spoon It In: Use a spoon to lightly scoop flour into your measuring cup until it’s slightly overfilled.
- Level It Off: Run the back of a knife across the top of the cup to remove excess flour.
Never scoop flour directly from the bag with the measuring cup—it compacts the flour and adds too much to your batter. Proper measurement ensures a perfectly balanced texture every time.
Preheat Your Oven (Why Temperature Spikes Matter)
Preheating your oven isn’t just a suggestion—it’s essential for consistent results. Baking banana bread in an oven that hasn’t reached the right temperature can lead to uneven cooking and a gummy center. Why does this happen? When the oven heats gradually while your bread bakes, the outside cooks faster than the inside, creating a frustrating texture imbalance.
To avoid this, always preheat your oven for at least 10–15 minutes before placing your loaf pan inside. Use an oven thermometer to confirm the temperature matches your recipe’s requirements. Consistent heat ensures your bread rises evenly and develops a golden crust without burning.
Add-ins Done Right (Nuts, Chocolate Chips Without Overmixing)
Who doesn’t love banana bread studded with chocolate chips or crunchy walnuts? However, adding mix-ins improperly can undo all your hard work avoiding overmixing. To incorporate add-ins without overworking the batter:
- Fold Them In Last: After combining wet and dry ingredients, sprinkle your mix-ins over the top of the batter and fold gently until they’re evenly distributed.
- Coat Mix-ins First: Toss chocolate chips or nuts in a light dusting of flour before folding them in. This prevents them from sinking to the bottom of the loaf during baking.
- Keep It Minimal: Resist the urge to overload your batter with extras, as too many add-ins can weigh down the bread and affect its structure.
A few thoughtful additions go a long way toward enhancing both flavor and texture.
The Toothpick Test Myth (Better Ways to Check Doneness)
You’ve probably heard about the toothpick test for checking doneness—but it’s not foolproof. Sometimes, a clean toothpick can emerge from undercooked bread due to uneven baking. Instead, try these more reliable methods:
- Visual Cues: Look for a deep golden-brown crust and edges that pull away slightly from the sides of the pan.
- Touch Test: Gently press the center of the loaf. If it springs back lightly, it’s done. If it leaves an indentation, give it a few more minutes.
- Internal Temperature: Use an instant-read thermometer to check the internal temperature of the bread. Aim for 200–205°F, which indicates it’s fully baked.
By relying on multiple indicators, you’ll never serve underbaked banana bread again.
Common Banana Bread Mistakes (Beyond Overmixing)
While overmixing is the number one mistake made when making banana bread, there are other pitfalls that can derail your recipe. These common errors might seem minor, but they can have a big impact on the final result. Let’s explore three additional mistakes to watch out for—and how to fix them.
Using Cold Eggs or Butter (Impact on Batter Emulsion)
Cold ingredients like eggs and butter can sabotage your batter before it even hits the oven. When you use cold eggs, they don’t blend smoothly with the wet ingredients, leading to an uneven emulsion. Similarly, cold butter won’t cream properly, which affects the texture of your banana bread. For best results:
- Bring Ingredients to Room Temperature: Leave eggs and butter on the counter for 30–60 minutes before baking. If you’re short on time, place eggs in warm (not hot) water for 5–10 minutes and microwave butter in 5-second intervals until softened.
- Why It Matters: Room-temperature ingredients combine more easily, creating a smooth batter that bakes evenly and yields a tender crumb.
Skipping this step can leave your banana bread dense or greasy, so always plan ahead.
Overbaking (How to Prevent Dry Edges)
Overbaking is another frequent culprit behind disappointing banana bread. The edges may turn dry and tough while the center remains underdone if the loaf stays in the oven too long. To avoid this:
- Set a Timer: Stick to the recommended baking time in your recipe, and start checking for doneness a few minutes before it’s supposed to be ready.
- Shield the Edges: If the top is browning too quickly, cover the loaf loosely with aluminum foil to prevent burning.
- Check Early and Often: Use visual cues and the touch test (as mentioned earlier) to determine when the bread is fully baked.
By keeping a close eye on your loaf, you’ll ensure it stays moist and flavorful.
Skipping the Resting Time (Why Cooling Matters for Slicing)
Patience pays off when it comes to cooling banana bread. Many bakers make the mistake of slicing into their loaf right after pulling it from the oven. Unfortunately, cutting too soon causes the bread to crumble and lose its structure. Here’s why resting matters:
- Steam Settles: Allowing the bread to cool lets residual steam redistribute moisture throughout the loaf, keeping it soft and tender.
- Firm Up the Crumb: Cooling helps the starches in the bread set, making it easier to slice cleanly without squishing.
Let your banana bread rest in the pan for 10 minutes, then transfer it to a wire rack to cool completely before slicing. Your patience will be rewarded with picture-perfect slices.
Troubleshooting FAQ: Banana Bread Edition
Even experienced bakers run into banana bread challenges now and then. Here are answers to some of the most frequently asked questions about common issues—and how to solve them.
Why Is My Banana Bread Raw Inside But Burnt Outside? (Oven Rack Placement)
This frustrating problem often stems from improper oven rack placement or uneven heat distribution. To fix it:
- Adjust the Rack: Place your loaf pan in the center of the oven, where heat circulates most evenly.
- Rotate the Pan: Halfway through baking, rotate the pan 180 degrees to ensure consistent cooking.
- Check Your Oven Temperature: Use an oven thermometer to confirm your oven is heating accurately. A too-hot oven can burn the exterior while leaving the inside raw.
These adjustments will help you achieve a perfectly baked loaf every time.
Can I Substitute Baking Soda with Baking Powder? (Ratio Warnings)
Yes, you can substitute baking soda with baking powder, but there are important considerations. Baking soda is about three times stronger than baking powder, so you’ll need to adjust the amount accordingly. For example:
- Substitution Ratio: Replace 1 teaspoon of baking soda with 3 teaspoons of baking powder.
- Acid Balance: Keep in mind that baking soda requires acidic ingredients (like bananas or yogurt) to activate, whereas baking powder contains its own acid. Adjust your recipe as needed to maintain flavor balance.
Always double-check your ratios to avoid flat or overly puffy bread.
How Do I Keep Banana Bread Moist for Days? (Storage Hacks)
To keep your banana bread fresh and moist for days, proper storage is key. Try these tips:
- Wrap It Tightly: Store the cooled bread in plastic wrap or an airtight container to lock in moisture.
- Add a Slice of Bread: Place a slice of white bread on top of the loaf before sealing the container. The banana bread will absorb moisture from the bread slice, staying softer longer.
- Freeze for Long-Term Storage: Wrap individual slices in plastic wrap, then place them in a freezer-safe bag. Reheat frozen slices in the microwave for 20–30 seconds for a freshly baked taste.
With these tricks, your banana bread will stay delicious for days—or weeks, if frozen!

Advanced Hacks for Next-Level Banana Bread
If you’ve mastered the basics of banana bread and want to take your recipe to the next level, these advanced hacks will elevate your loaf from good to gourmet. Whether you’re looking to add bold flavors or accommodate dietary restrictions, these tips will inspire your creativity in the kitchen.
Brown Butter Upgrade (Adds Nutty Depth)
One simple way to transform your banana bread is by using brown butter instead of regular melted butter. Browning butter adds a rich, nutty flavor that pairs beautifully with the sweetness of bananas. Here’s how to make it:
- Melt Butter Slowly: Heat unsalted butter in a light-colored skillet over medium heat until it foams, then turns golden brown with a toasted aroma.
- Cool Before Using: Let the brown butter cool slightly before adding it to your wet ingredients to avoid scrambling the eggs.
This small upgrade makes a big difference, giving your banana bread a sophisticated twist.
Swirl-In Sauces (Cinnamon Caramel, Peanut Butter)
Take your banana bread to dessert-worthy heights by swirling in decadent sauces. These additions create beautiful layers of flavor and texture:
- Cinnamon Caramel: Drizzle homemade or store-bought caramel sauce over the batter, then use a knife to swirl it gently for a marbled effect.
- Peanut Butter Ribbon: Dollop spoonfuls of creamy peanut butter onto the batter and swirl lightly for a salty-sweet combination that’s irresistible.
These sauces not only enhance taste but also make your loaf visually stunning.
Gluten-Free/Dairy-Free Tweaks (Tested Substitutions)
For those with dietary restrictions, banana bread can still be a crowd-pleaser. Here are tested swaps to make your recipe gluten-free or dairy-free:
- Gluten-Free Flour: Use a 1:1 gluten-free flour blend designed for baking. Add an extra teaspoon of xanthan gum if it’s not already included in the mix.
- Dairy-Free Options: Replace butter with coconut oil or vegan margarine, and use almond milk or oat milk instead of regular milk. These substitutions maintain moisture without compromising flavor.
With these tweaks, everyone can enjoy a slice of your delicious banana bread.
Final Checklist for Flawless Banana Bread
Before you bake your next loaf, keep this checklist handy to ensure success every time:
- Do use ultra-ripe bananas for maximum sweetness and flavor.
- Don’t overmix the batter—stop when streaks of flour remain.
- Do measure flour correctly using the spoon-and-level method.
- Don’t skip preheating your oven; consistent heat is crucial.
- Do let the bread cool completely before slicing for clean cuts.
- Don’t forget to experiment with upgrades like brown butter or swirl-ins!
By following these tips, you’ll bake banana bread that’s moist, flavorful, and unforgettable. Bookmark this guide or share it with fellow bakers—it’s your ultimate resource for mastering the art of banana bread!